
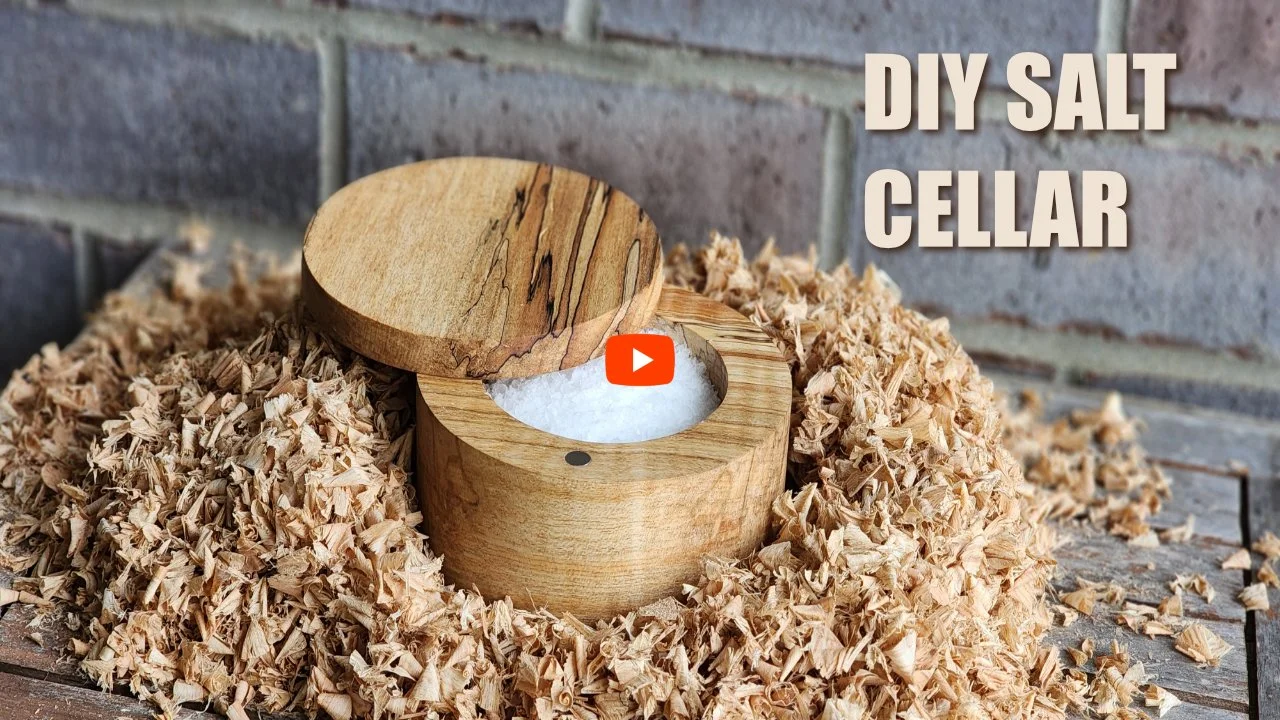
DIY Salt Cellar (No Lathe Required)
More of a visual learner? Click above and watch how I build this gorgeous salt cellar on YouTube!
Affiliate Disclosure:
Some of the links below are affiliate links. If you choose to purchase through them, I may earn a small commission at no extra cost to you. I only recommend tools I actually use and trust. Thank you for supporting the channel!
What started out as a Christmas gift for my MIL, has turned into several people reaching out wanting one. Salt cellars come in just about any shape and size you could imagine. I mean that literally. Imagine a salt cellar that looks radically different than anything you have seen. That imaginary salt cellar, that you are conjuring right now, can probably be made. How awesome is that?! I can’t wait to explore some of my own radical designs in the future. But for now, I have settled on something timeless.
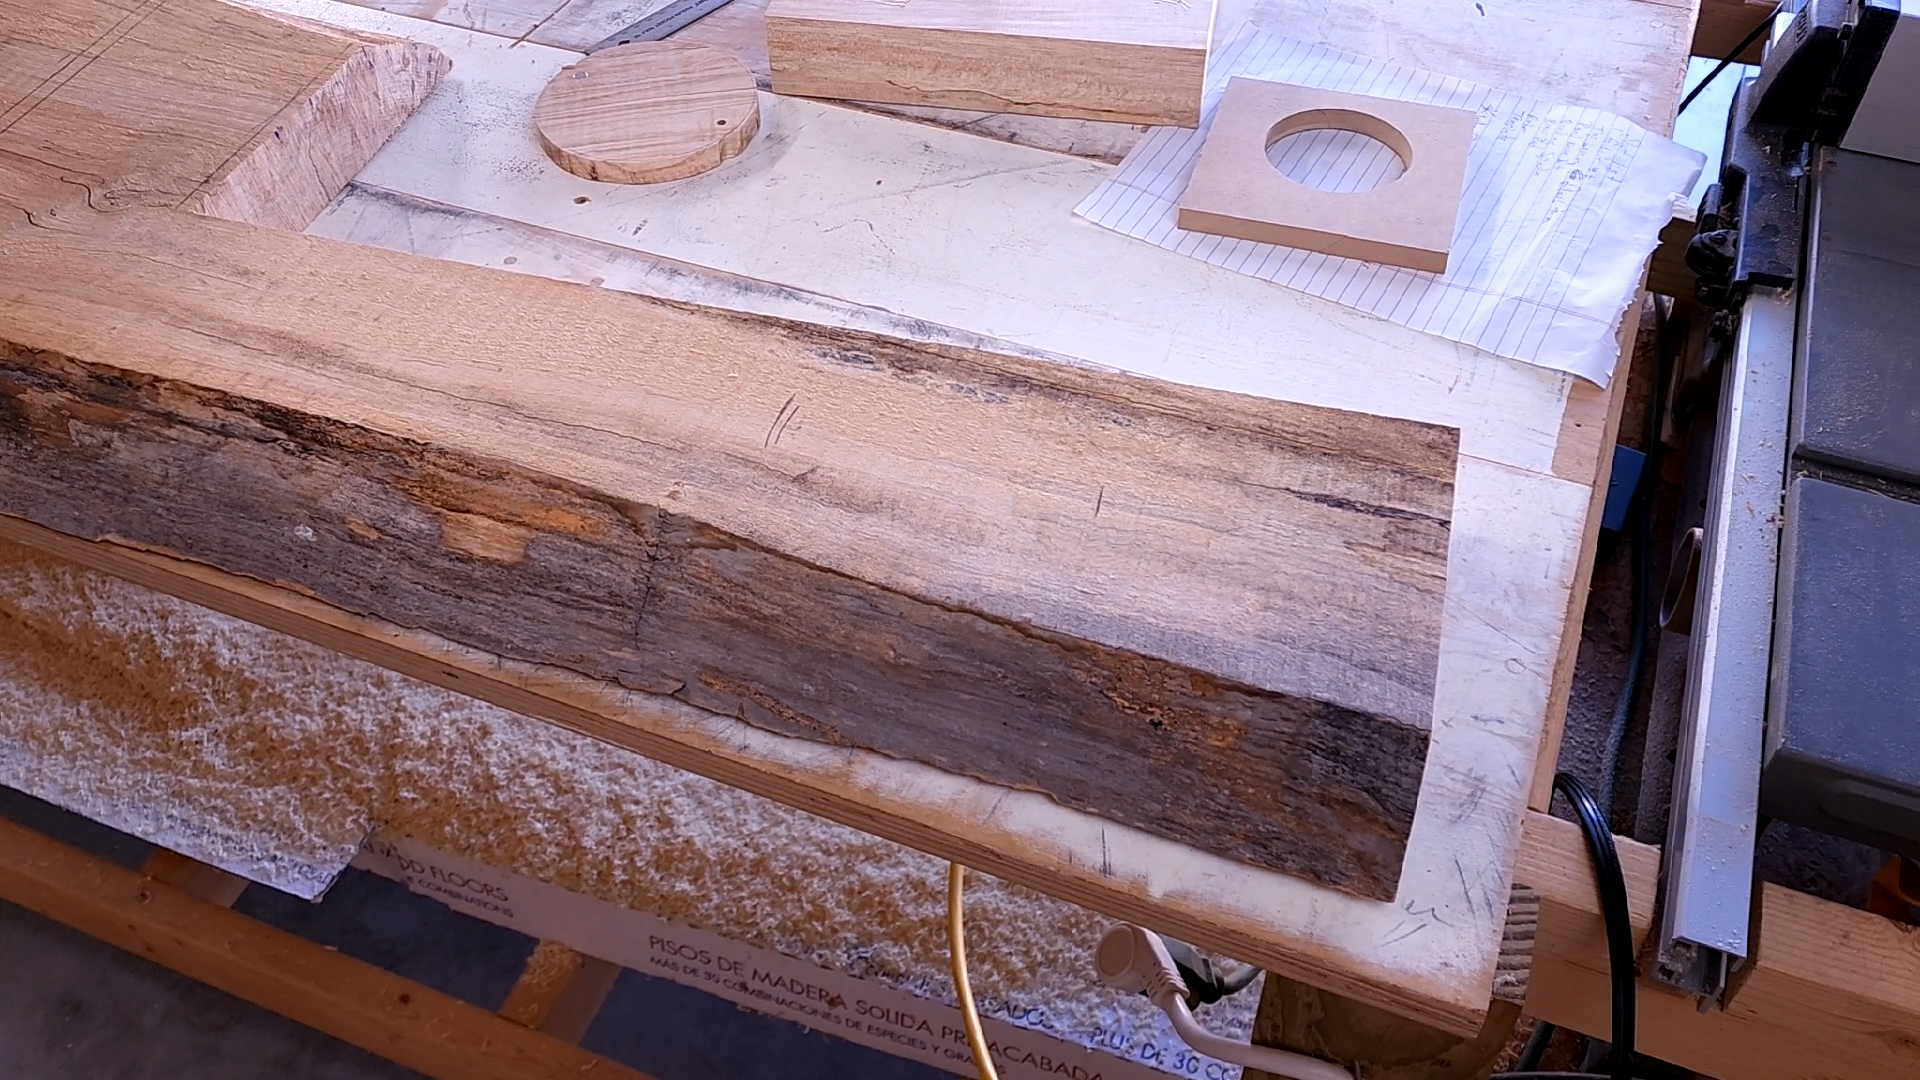
I am using 8/4 spalted maple. Before milling and re-sawing, I layout the sections that will be used for the bases and what section will be used for the lids.
I like to make sure the sections I use for the lids are oversize quite a bit because it will make the transfer of the holes for the pivot rod and magnet more forgiving. This will make more sense when we get to that section.
During this step I trim off any live edge so I am working with square blanks. I then get my lid blanks cut from some of that lovely square stock.
My lid blanks start around 1/2 an inch. Then I set them aside for a couple of days to warp and settle. It’s going to happen, they will warp. Probably. While they are Netflix warping and chilling I use this time to make the base.
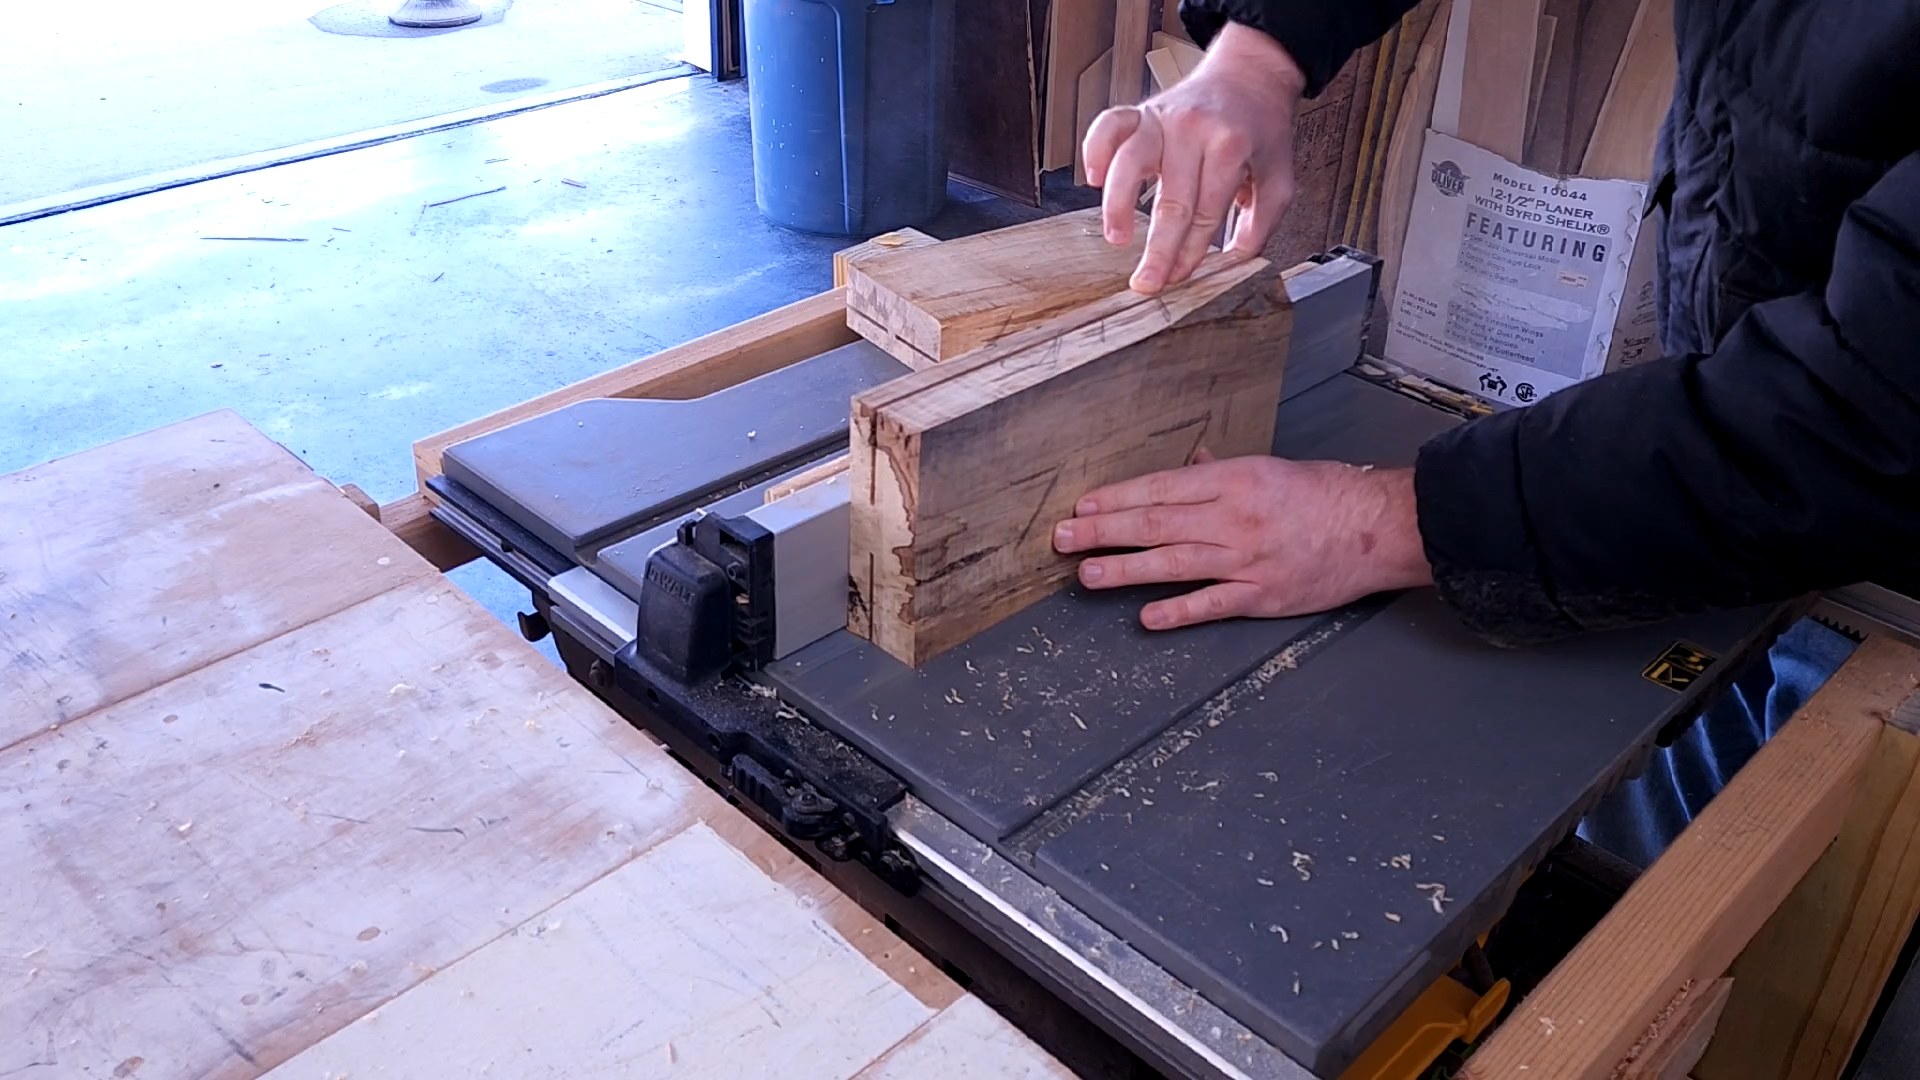
I re-saw on my table saw and I take shallow passes on both sides until only a very tiny bit of wood remains. A handsaw finishes the job.
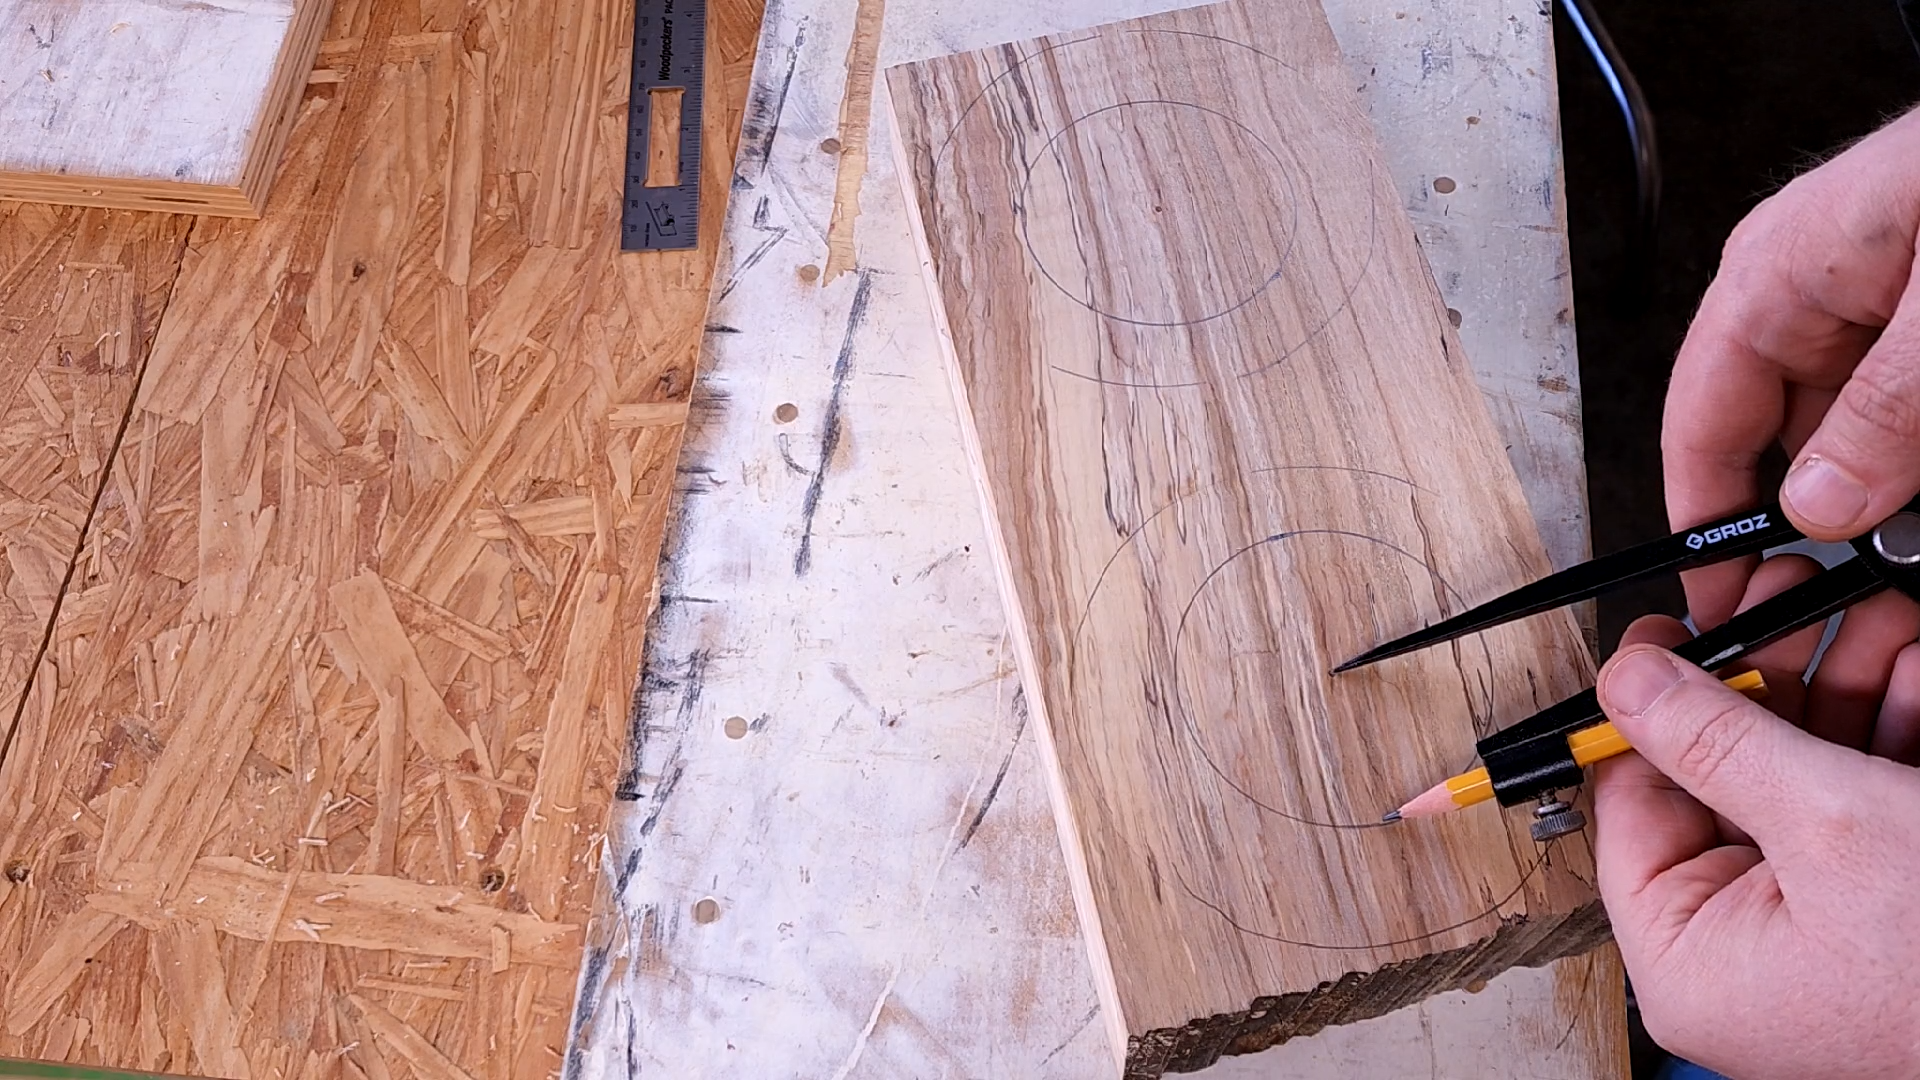
I am laying out the inner diameter which is the salt well. I have not yet laid out the formal outer diameter. What you see above is a rough outline to make sure I had enough clearance.
My order of operations are: Setting the compass for inner diameter, making a template, setting the compass for outer diameter.
Once you decide on the size of the salt well, set your compass. Mine was around 4 inches, so I set my compass to around 2 inches. Being surgically precise isn’t necessary, but consistency is. That’s one of reasons I love my compass. It’s beefy, it doesn’t feel like I am ever going to break it and once I lock it in place, it doesn’t move. When I have my salt well(s) laid out, I layout 1 more on some MDF, or Ply. Carefully cut close to your line with a jigsaw. Sand to your line with a spindle sander.
I don’t have multiple compasses, so I have to adjust my only pair to layout the outer diameter. That’s why for me, the order of operations is important. It’s also nice having a set of procedures locked in your brain going into a project.
Once The inner diameters are laid out and the template is made I adjust my compass to around 3/4 of an inch bigger. I use my ruler to mark 3/4” out from any point on the inner circle, place the compass point in the hole, and bring the pencil leg to the 3/4” mark I just drew. Lock it! Twirl it! We have our outer diameter.
Set your one and only compass to the side, undisturbed. We will need it again.
WARNING! Before laying out your inner circle. Decide if you want to use a round nose bit (which will give you a concave bottom) or if you would rather have a flat bottom. A template is a pattern. In order to turn a round nose bit into a pattern bit (a bit that follows the path of a pattern) it needs a guide bushing. Using a guide bushing creates an offset. This isn’t complicated, it’s just additional knowledge that needs a dedicated spot in your brain to live.
What’s the offset? How much larger you need to make your inner circle on your stock and your template.
The outer diameter of the guide bushing minus the diameter of the bit tells us the total difference between them.
But because the bit sits centered inside the bushing, we only need to account for half of that difference.
That final number is the offset.
Offset = (Bushing OD − Bit Diameter) ÷ 2
So what does this mean? This means if you want to use a bit that requires a bushing, you take whatever size you wanted your salt well and add whatever number you get for your offset to it. Set your compass. Lock it! Twirl it!
I use a Freud PB-007: 1" (Dia.) Forstner Bit bit to remove the bulk of the waste. I set my depth stop around 3/4” or so. The forstner bit will leave these points behind that need to get cleaned up. I want to make sure I leave enough room for that. After all is said and done, this salt well will be just over 1” deep. That is for the salt cellars I made with a straight flush trim bit. I couldn’t get that deep with my round nose bit.
If you are wanting a concave bottom (guide bushing - round nose bit combo) I would layout your inner circle as you normally would (your desired opening + offset) and then I would also layout your desired opening without the offset. When you go to remove your waste, do not go beyond the layout for your desired opening (what should be, a slightly smaller circle). If you go too far, you risk going beyond the offset and you could see forstner bit teeth marks at the bottom of your salt well. Don’t ask me how I know!
You can ask your template nicely to not move. OR - use double sided tape.
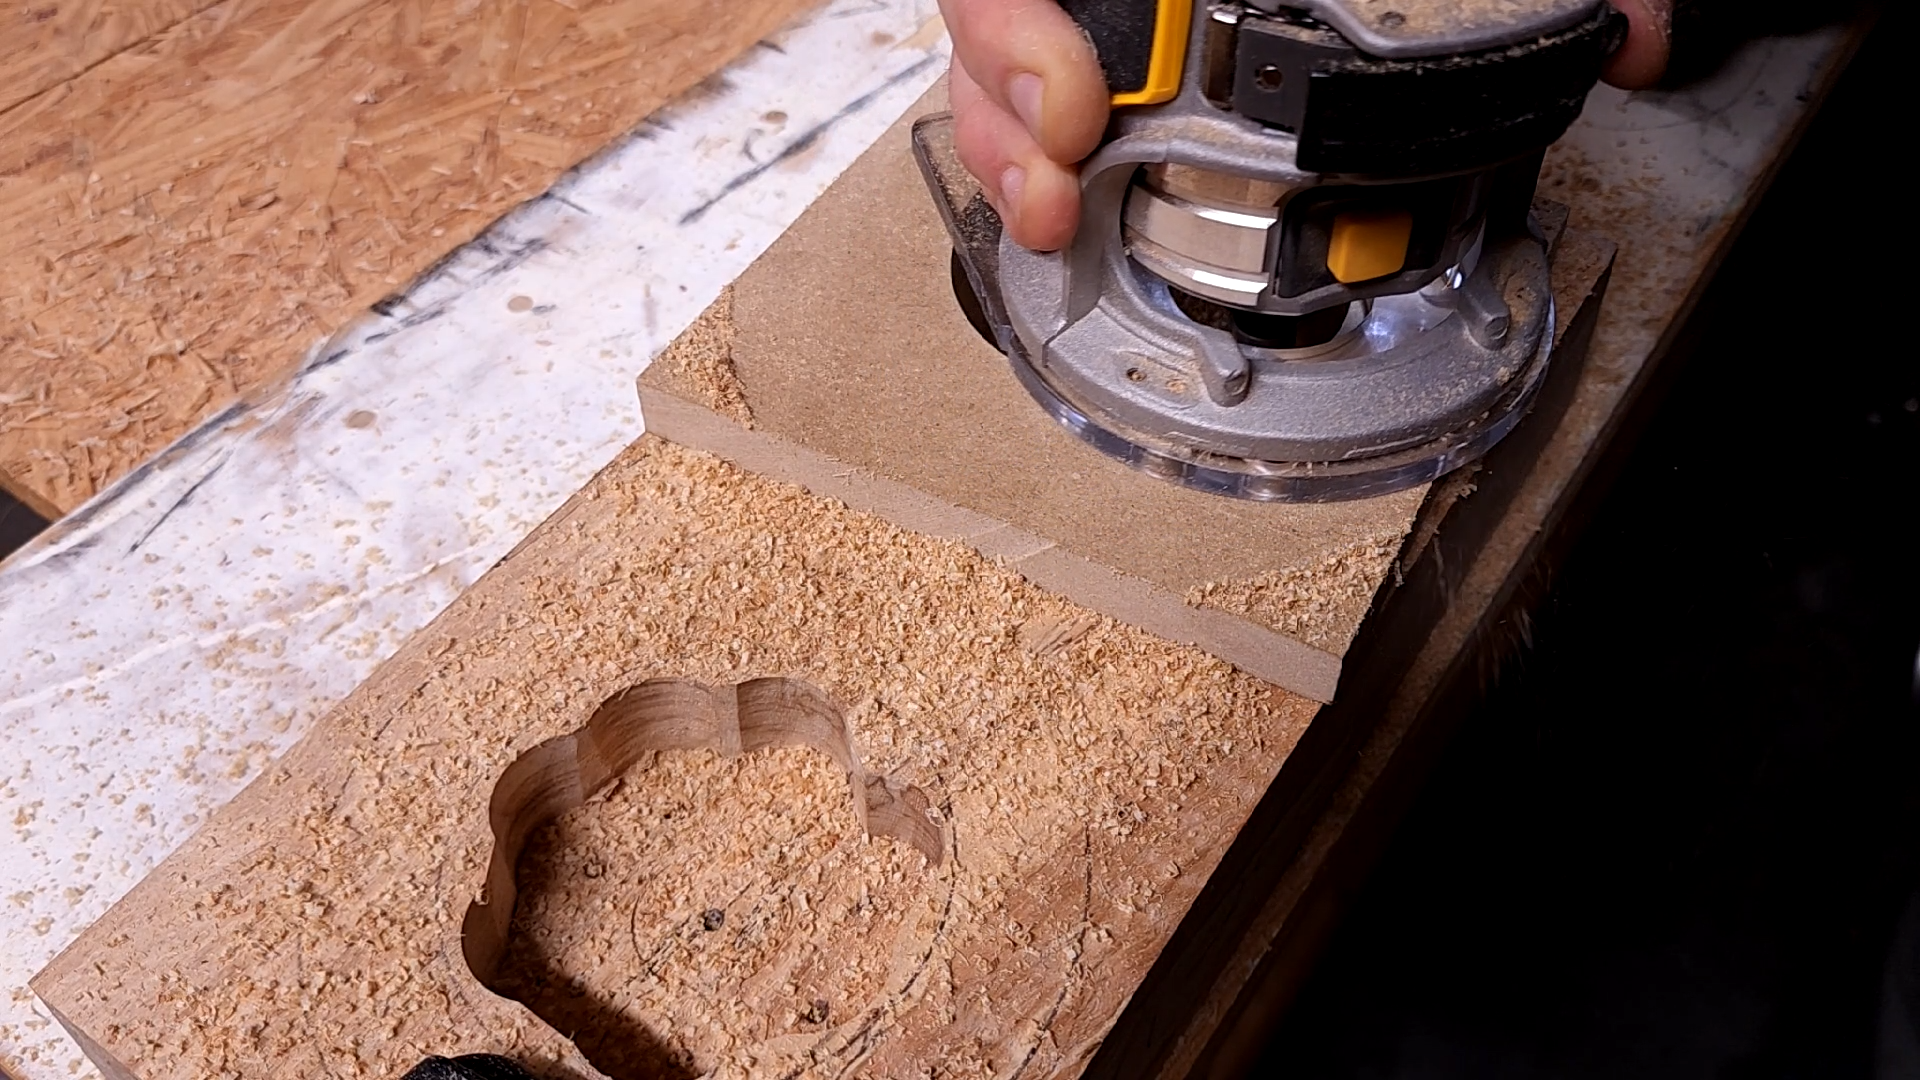
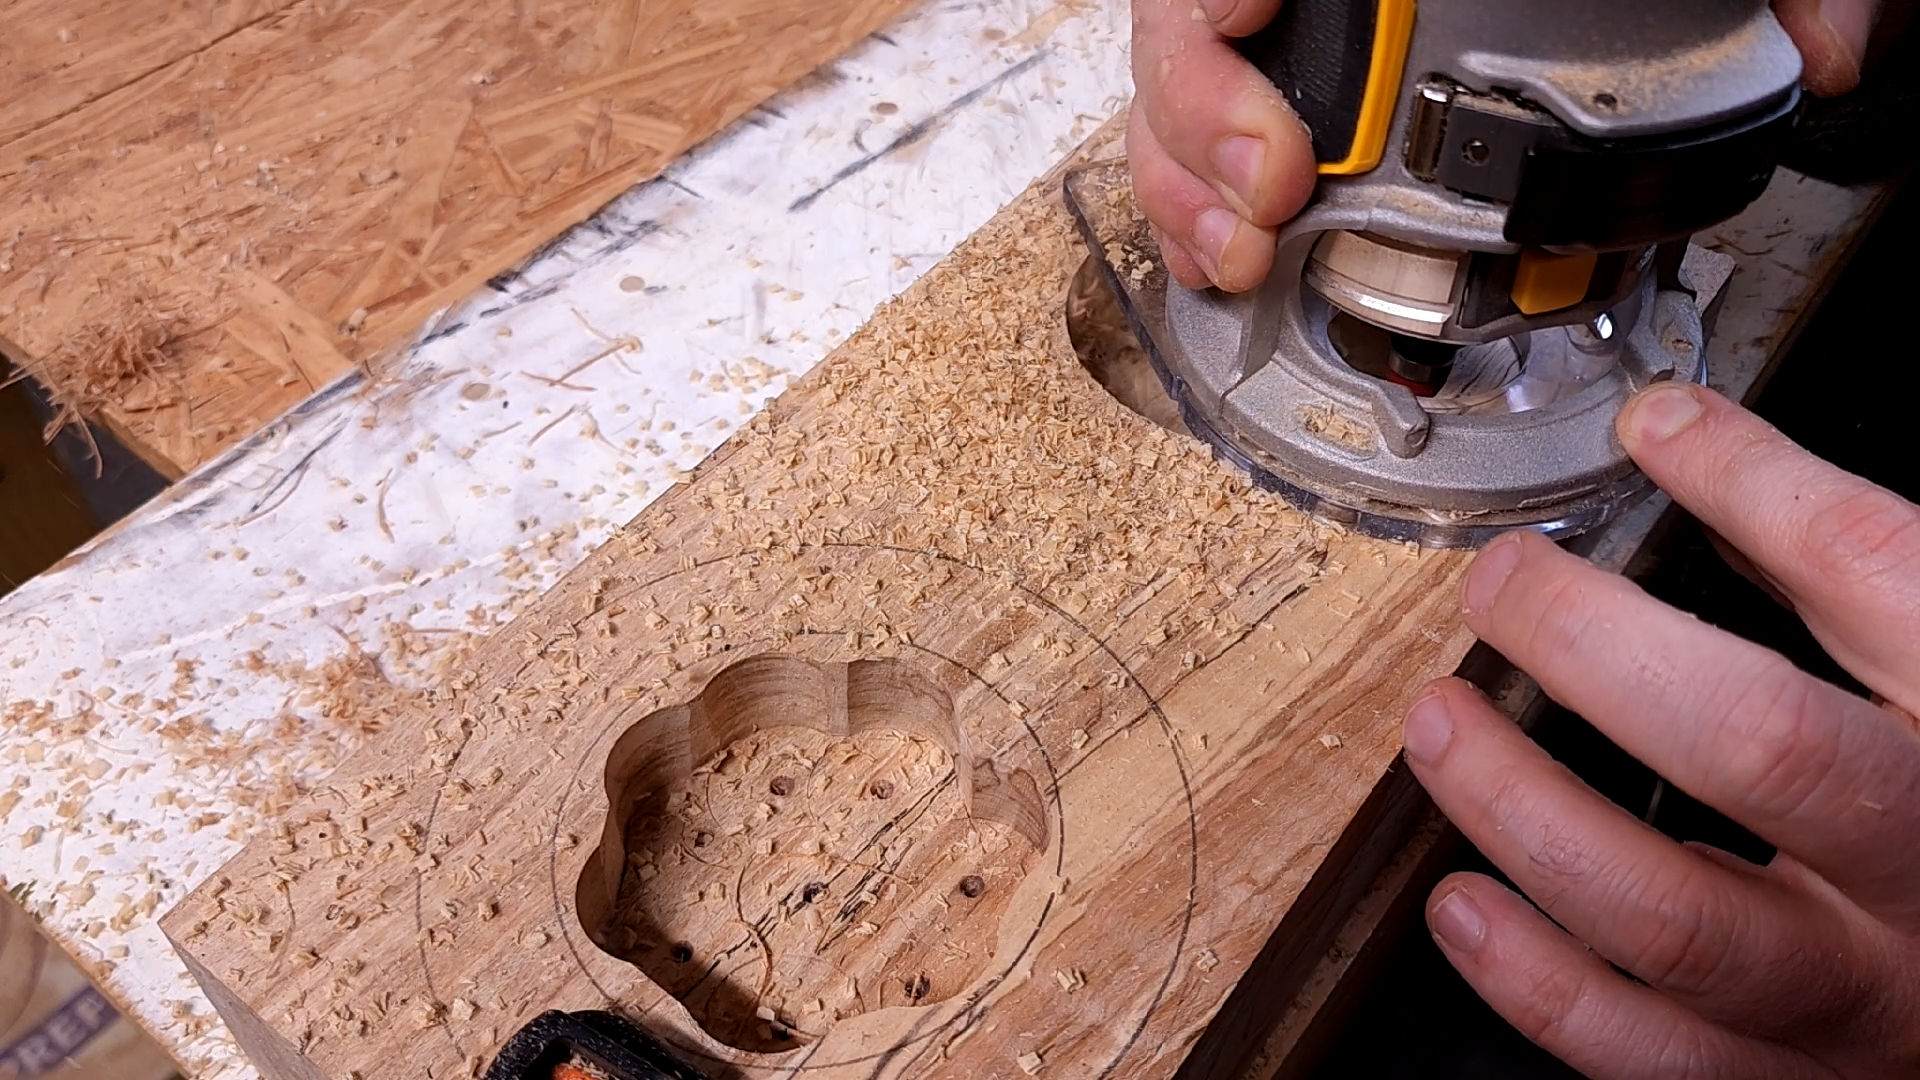
It’s time to set your template into place and clean up the inside. In the image above I am using a Freud 42-104: 1/2" (Dia.) Bearing Flush Trim Bit. My first pass, I lower the bit until it is able to ride along the inside of my template, clockwise.
This gives me a nice clean wall for my bit to reference from. I will take one more pass around, a little deeper. But making sure the bearing on my bit is still able to make contact with the template.
When it’s no longer safe to proceed with the template (because lowering the bit any farther would put the bearing below the template and that’s a no fly zone) I remove the template and use the smooth wall of the salt well that was just created using said template to finish cleaning up everything below it.
This requires a tilt plunge on fixed base routers like mine. Shallow cuts and slow movements will get you to the finish line.
It may look like I am pressing on the drill but I am keeping it rigid. You don’t want to press down very hard at all. You’ll end up with deep scratches.
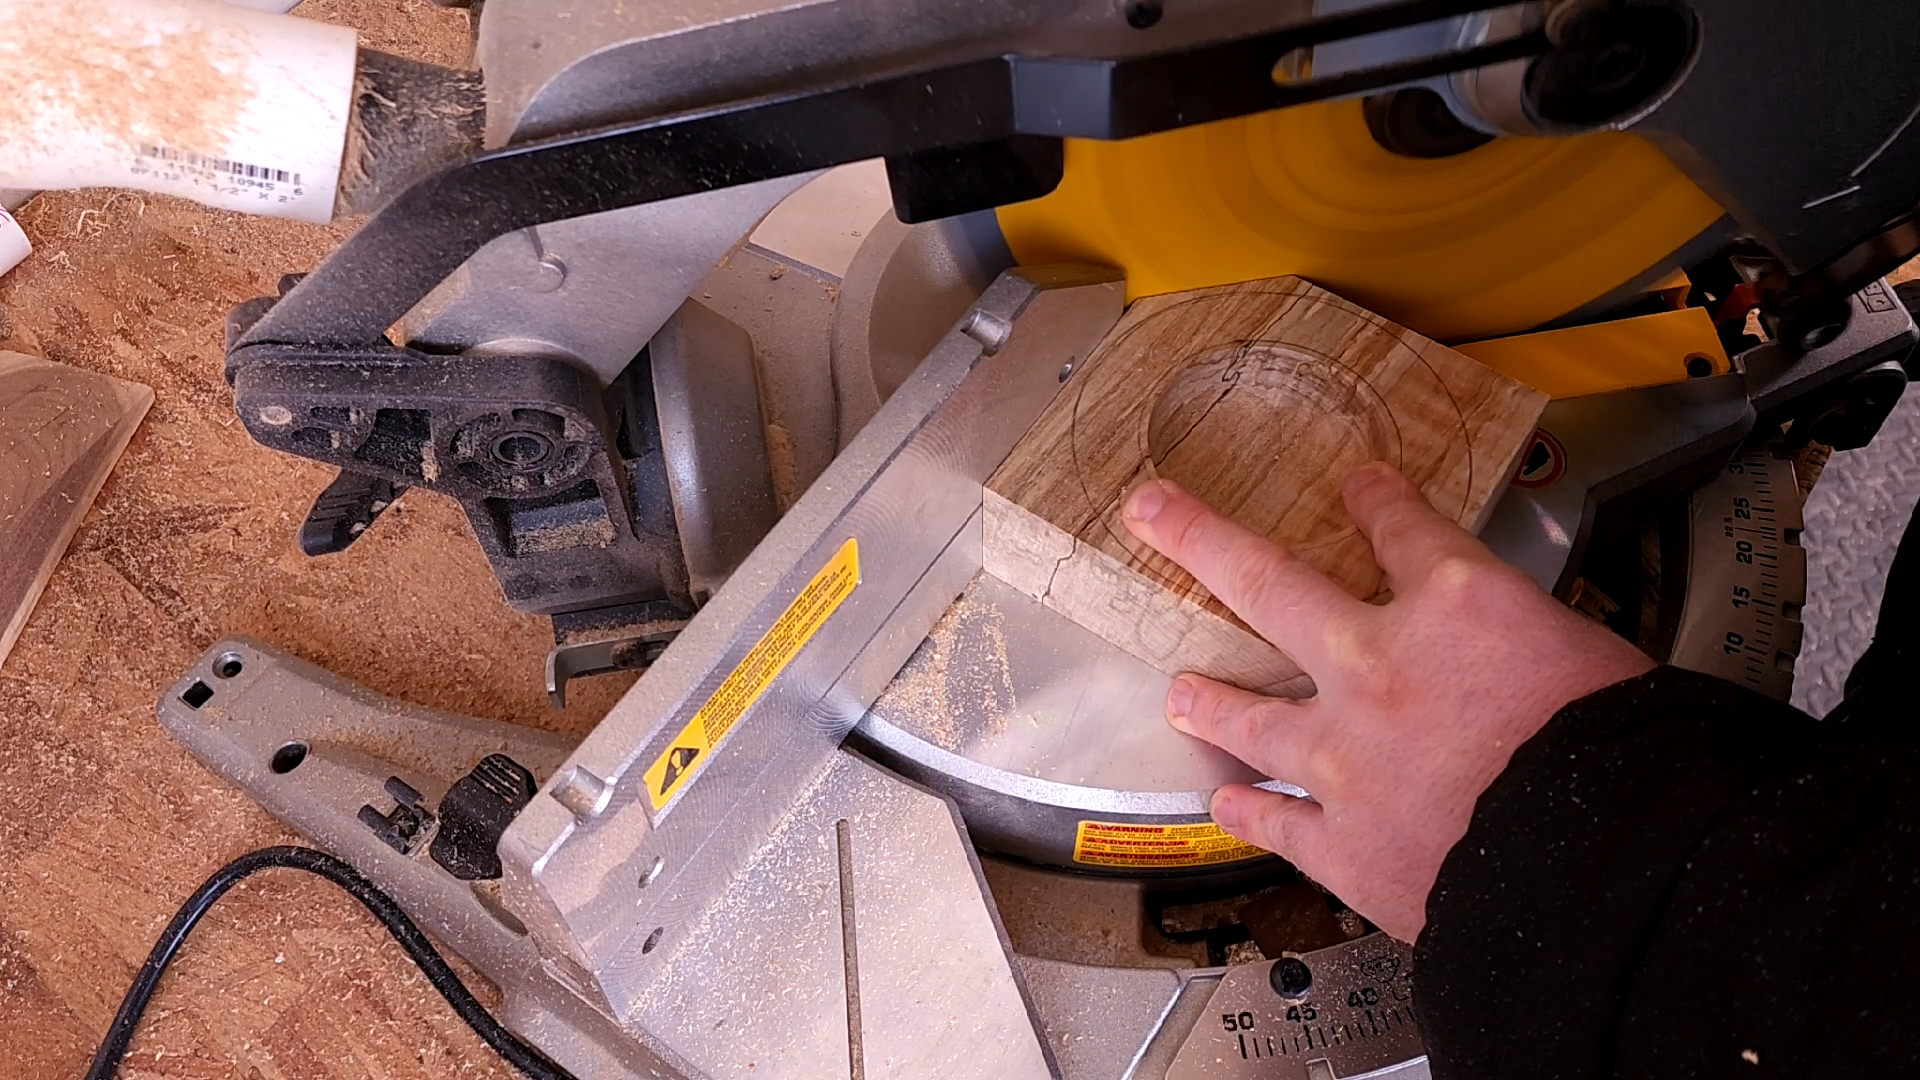
It’s time to start creating the actual shape of our base. This starts by trimming away the bulk of the waste before we go to the disc sander.
I have a Grizzly bench top band saw that I used when making this the first time. Using a miter is way faster.
Set it to 45 degrees and have at it.
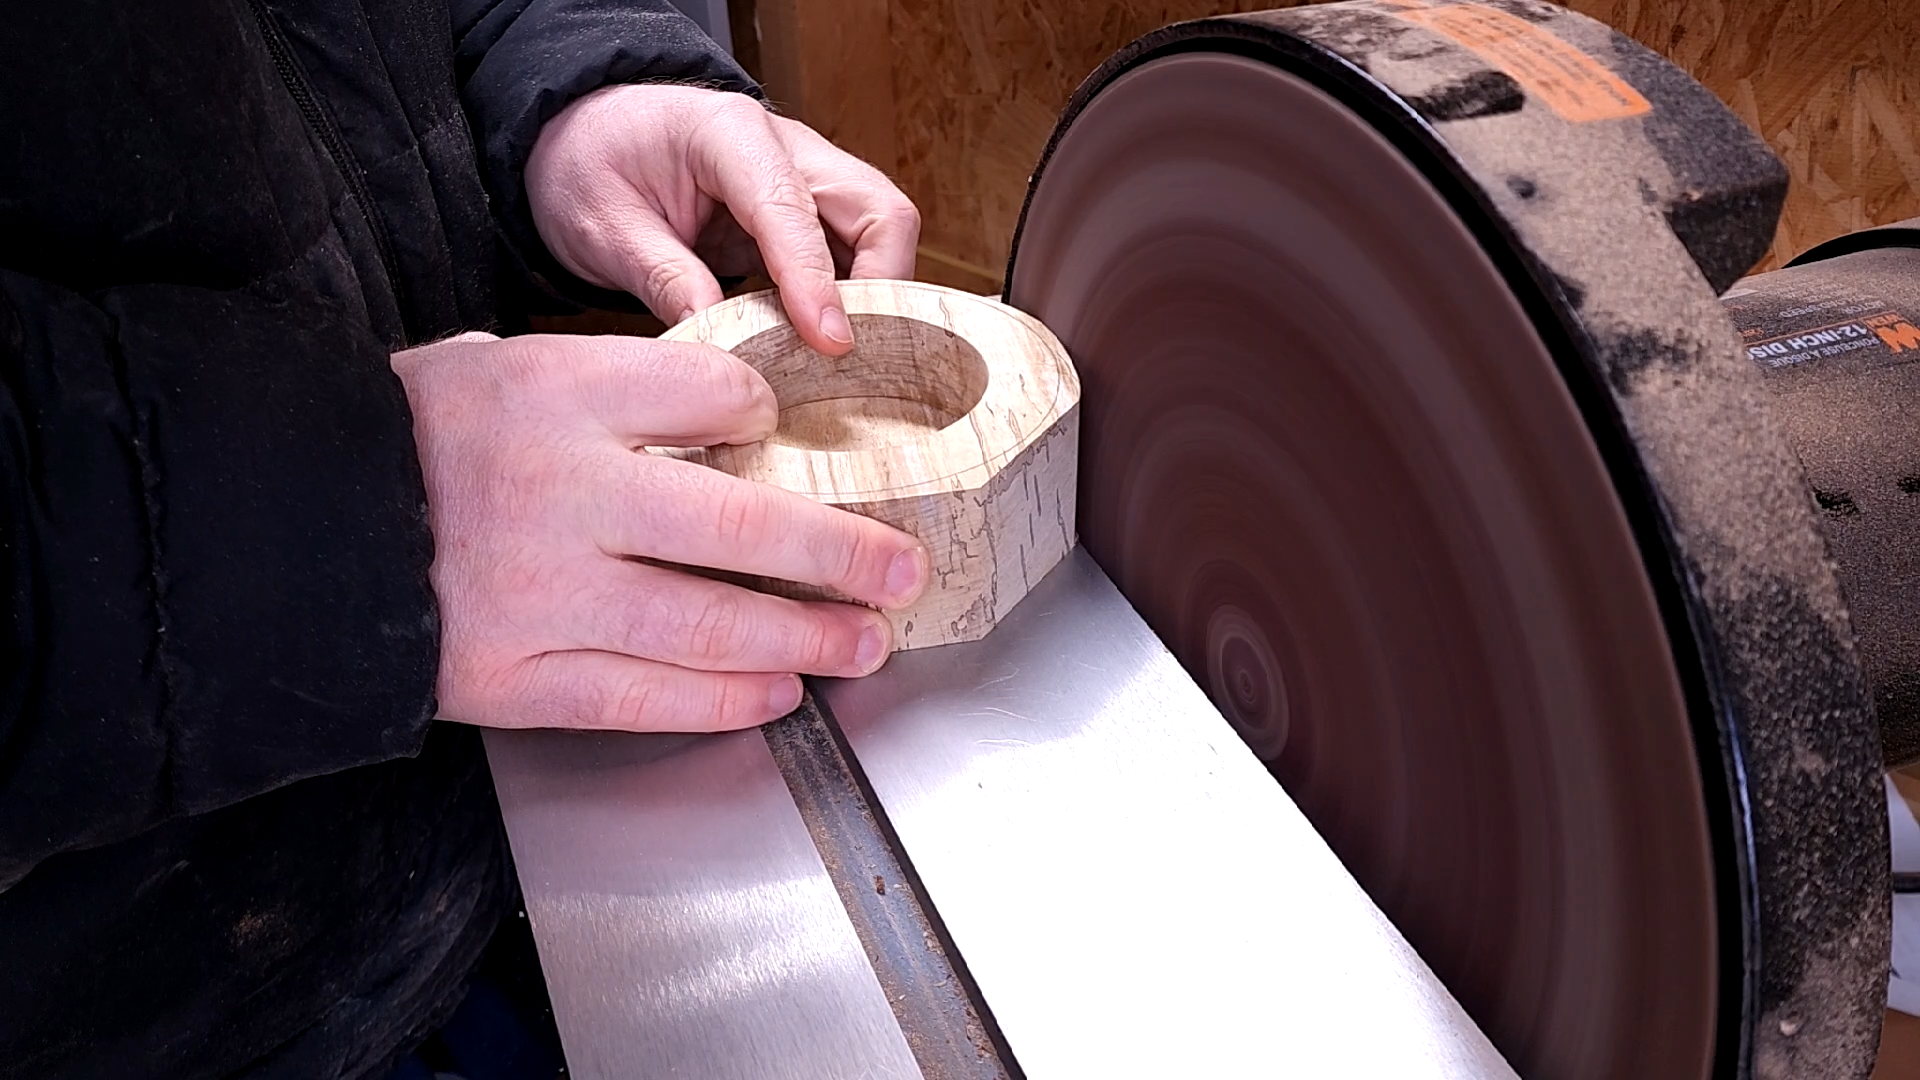
My Wen 12” Disc Sander has become one of my most used tools.
Pivot Rod and Magnet alignment on the base and lid is so easy, it feels like cheating.
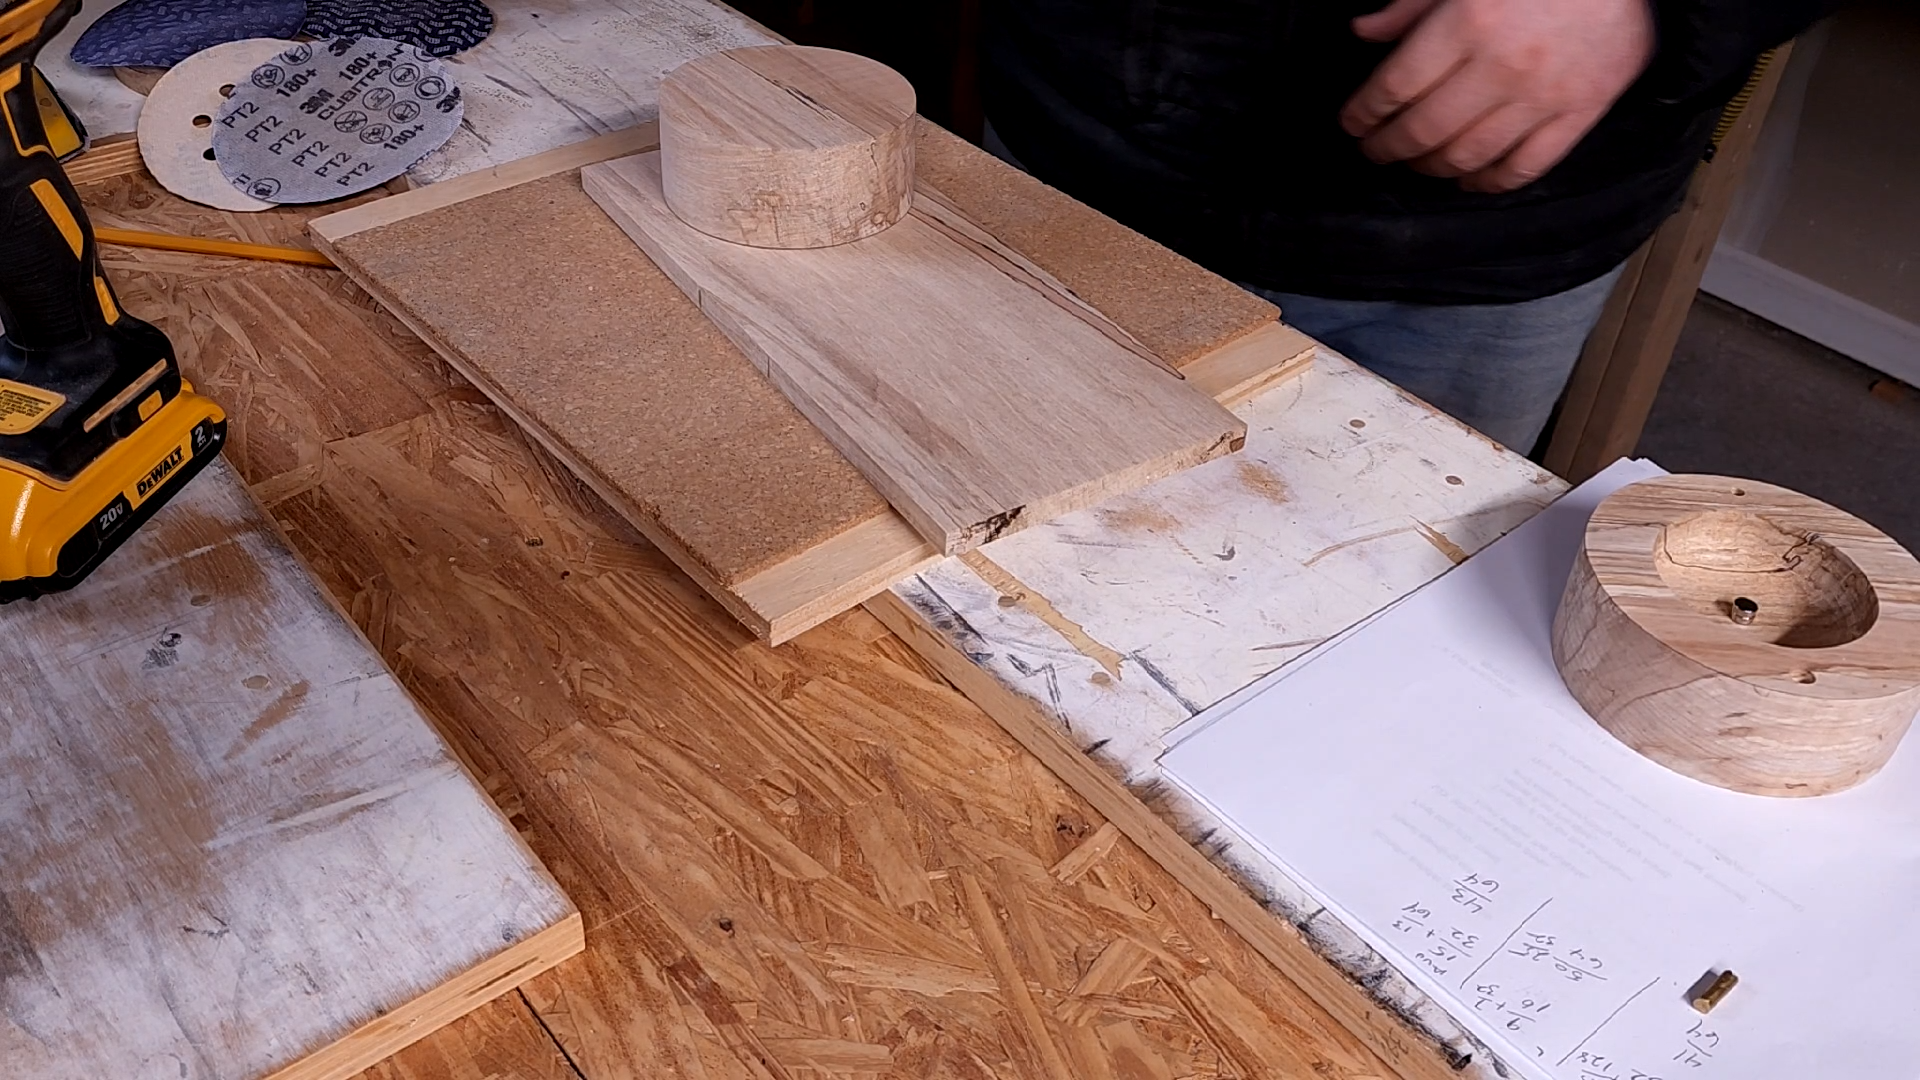
Those lid blanks you have been letting warp off to the side…it’s time to finish their milling process.
I take the salt cellar base and flip it over and trace the base. I also make sure that I have plenty of extra room on all sides of the lid blank. This will be important in a minute.
A piece of blue painters tape (or green frog tape) stretched across the base, over the salt well, right in the center. Use a center punch or whatever you have that makes a small hole and place your marks at the halfway mark on the rim of the base. Both sides! While you are at it, either crease an end of the tape that hangs over the side or mark where the tape and edge of the base meet.
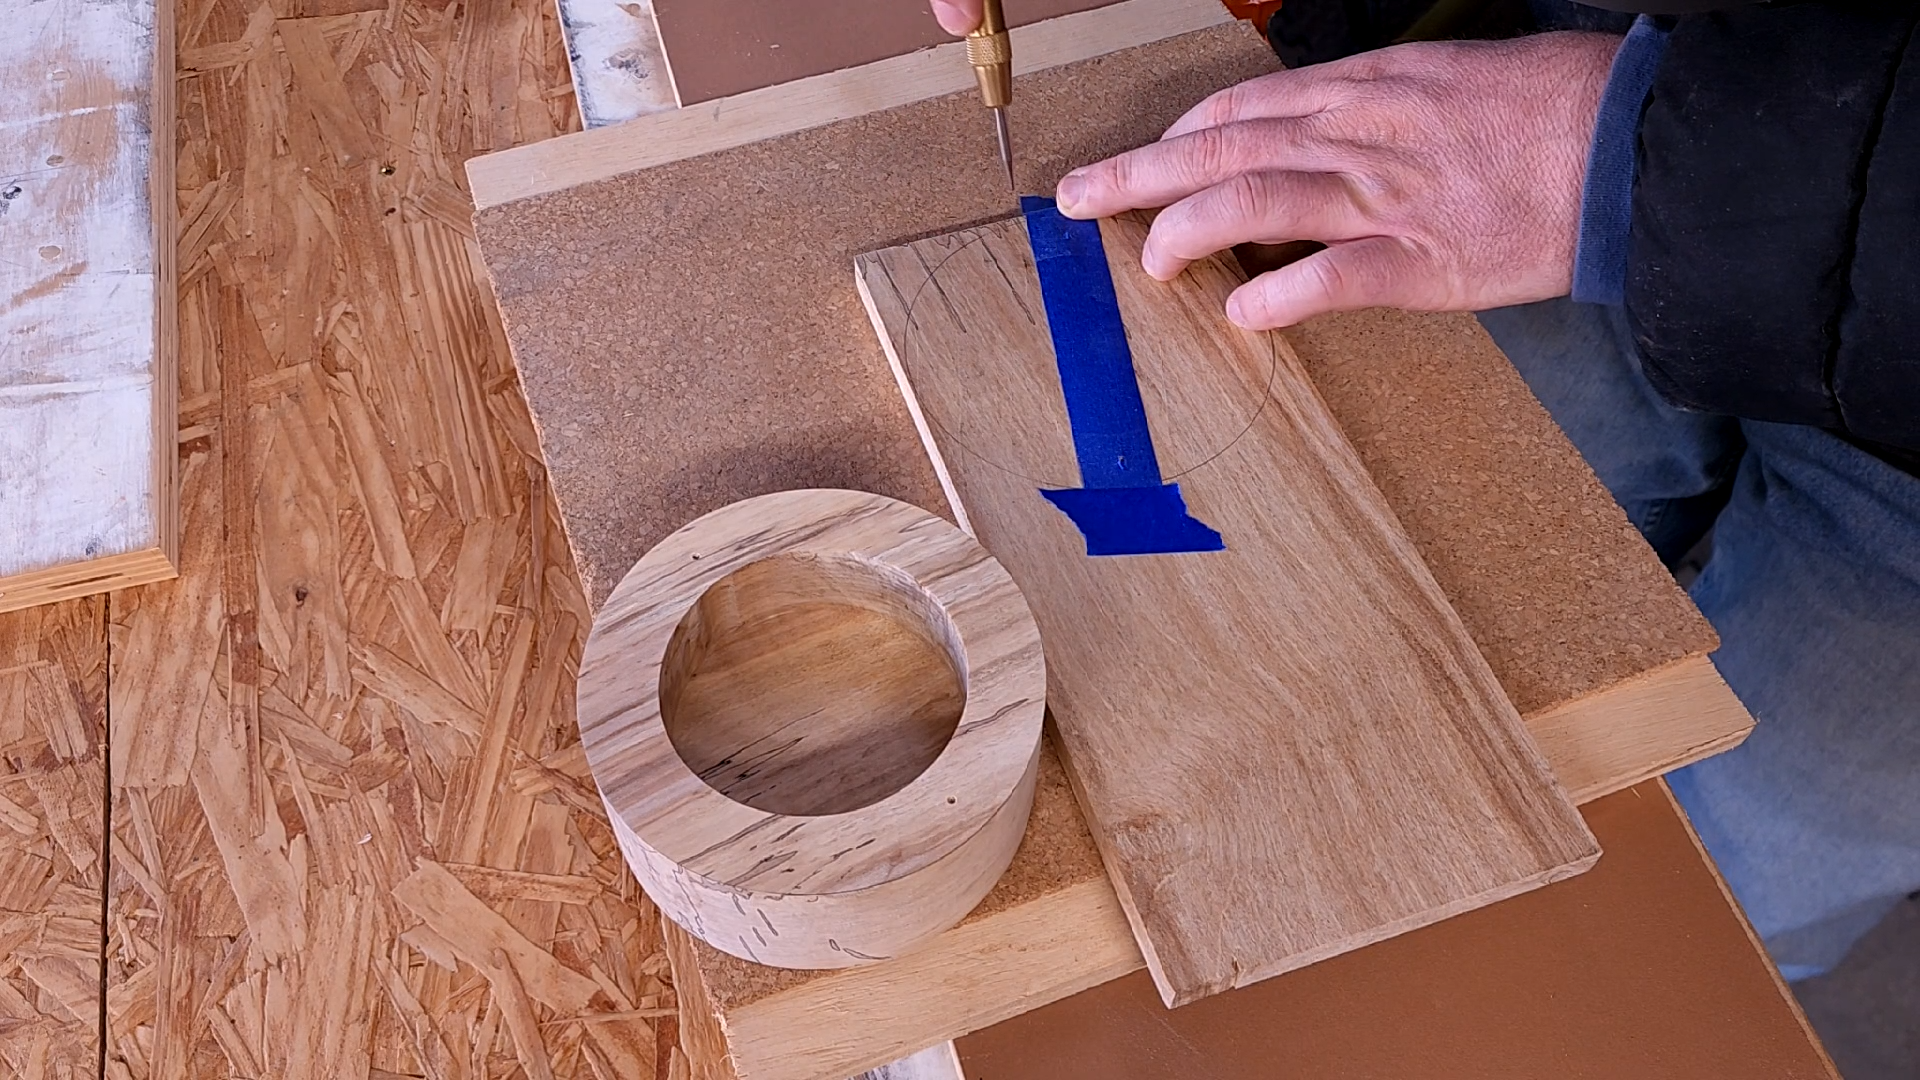
Do you see how close that lid line is to the edge of the blank? I would recommend having more room than I left myself.
I sanded before I completely seated my magnets. I have also made lids where I ended up sanding after. But that means our outer diameter circle we had, is gone. We need it back.
I test fit my lid blank to my base and flip the whole thing over. If your lid blank was big enough, then your tape transfer alignment doesn’t need to be perfect because the extra wood helps correct for that error.
So with the base and lid blank connected and flipped over, I trace the base diameter to the lid. This becomes the new guide line.
I then take the blanks to the miter and trim them the same way I did the base. Then I take them to my spindle sander, to sneak up on my line. But I don’t ever actually get to my line. On purpose. I like my lids to have a lip….rim?….edge? Not flush to the base.
Hand sanding brings them home up to 220 grit.
I got my wax recipe from David over at Make Something. He may or may not be my spirit animal.
The only thing to do now is load your salt cellar up with some salt and enjoy!
If you are more of a visual learner, check out the video over on YouTube.
Giveaway Details! I am currently doing a giveaway. You can be entered to win the salt cellar featured at the top of this blog. All the details are in the description of the video. When I reach 500 subs I will pick one person at random and I’ll send them that salt cellar. For a chance to win, you must be a subscriber and you have to leave a comment on the salt cellar video. Any comment will work. I will reply directly to your comment and you will need to email me from the same account you made the comment from so I can verify. I will never ask for payment, I ship at my own cost. I will only communicate using my channels official contact information.
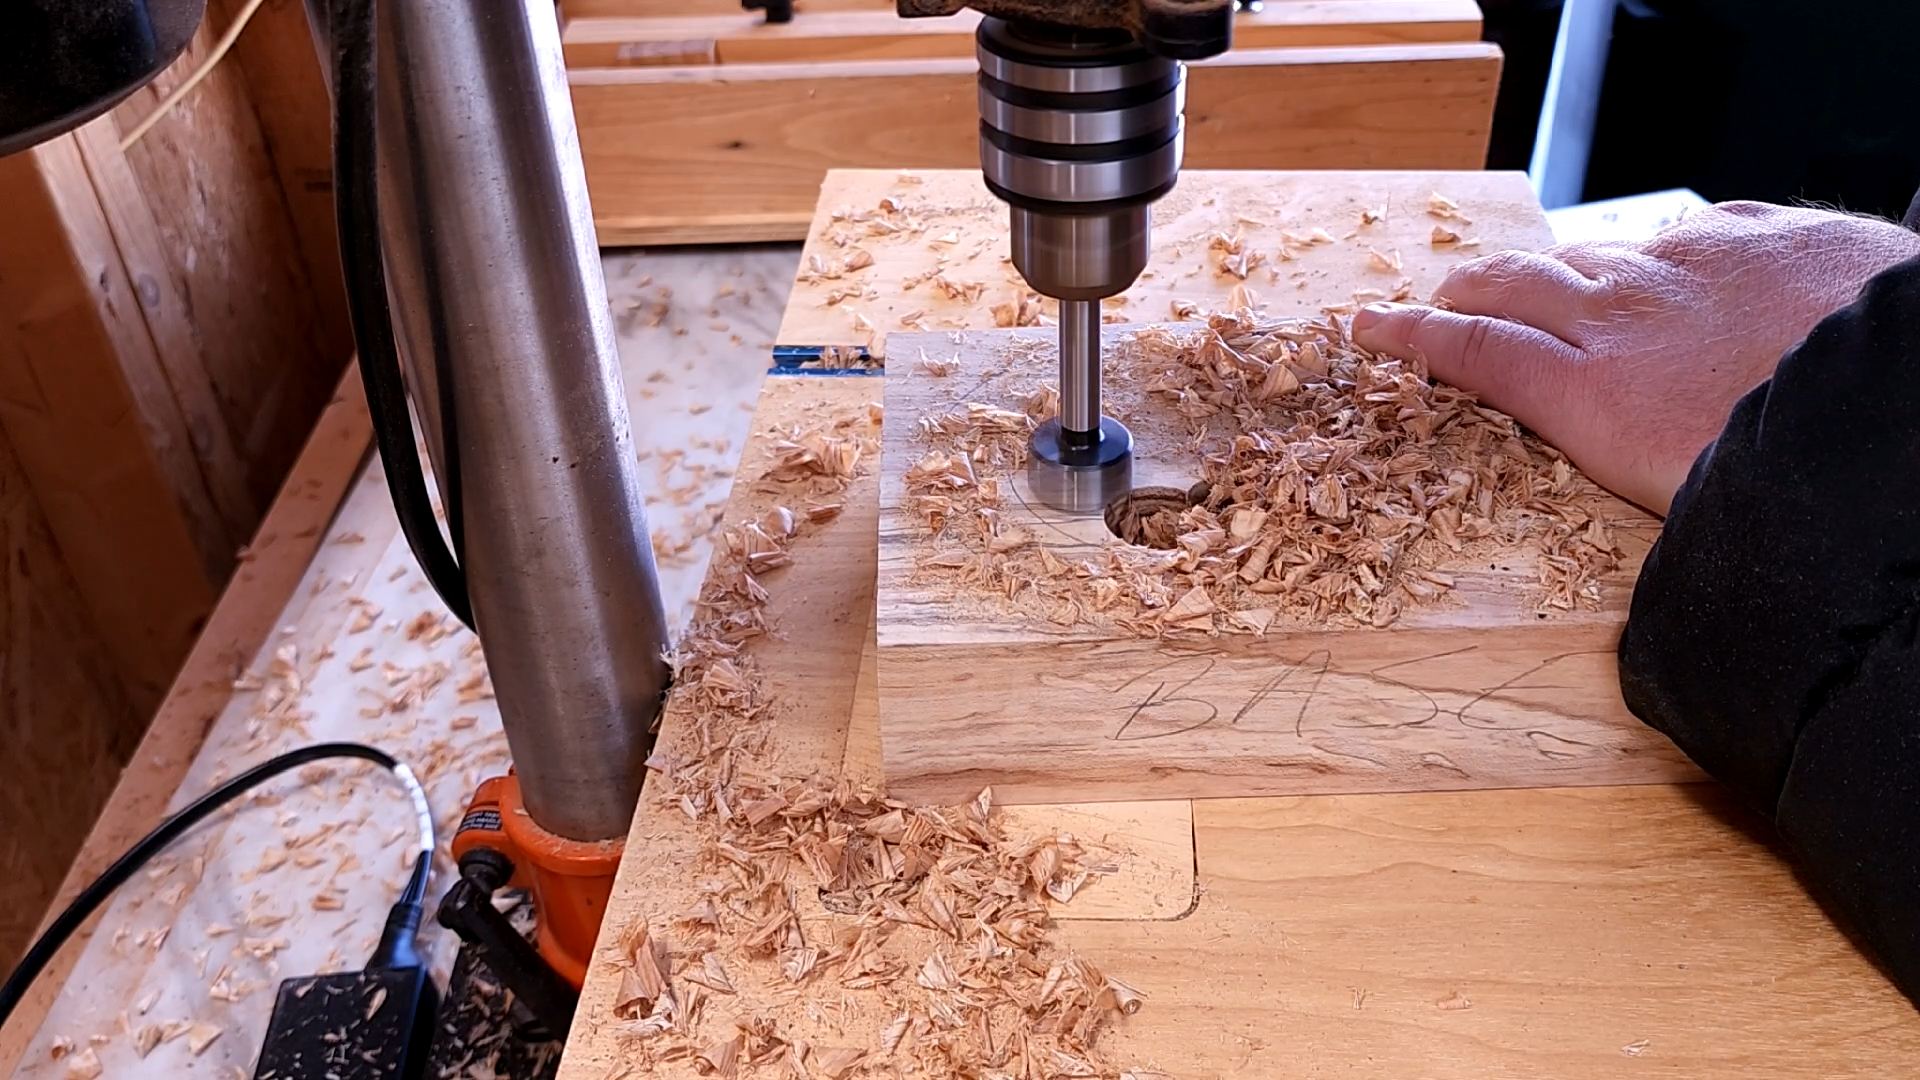
Drill press makes quick work of waste removal. This can be done with a power drill. I would clamp your work piece down though. And after you make your first hole, if you overlap your subsequent holes, the wood chips have a path to escape decreasing overall heat build up and requires less effort to get through the wood.
If you made it this far, congrats. you just made a water bowl for a squirrel or other tiny forest dwellers.
I sand the salt well before moving on because I can use a clamp on that extra wood I haven’t cut away yet to hold my work piece down and not worry about it being in the way. This part is such a breeze because my Pomsare sanding discs chuck into my drill and allows me to sand up to 1000grit in a matter of minutes, not hours.
I start at 80, work my way up to 1000. I use compressed air to blow out the salt well in between grits. I sand the walls of the salt well by hand (unfortunately) but I only go to 220. Only the bottom gets burnished.
Peep that world class dust collection
I use a Wen 12” disc sander to round over the pointy bits left over from the miter saw. It has 60 grit on it so it removes material really fast.
But that also means it leaves some gnarly scratches in the wood. After I get the base looking like a circle, and inch a bit closer to my layout line I move over to the spindle sander (which is 80 grit) to remove the 60 grit scratches and get me a little closer to my line.
When I am satisfied with the shape and relative distance of my line, I sand the rest by hand moving from 120 to 220 grit.
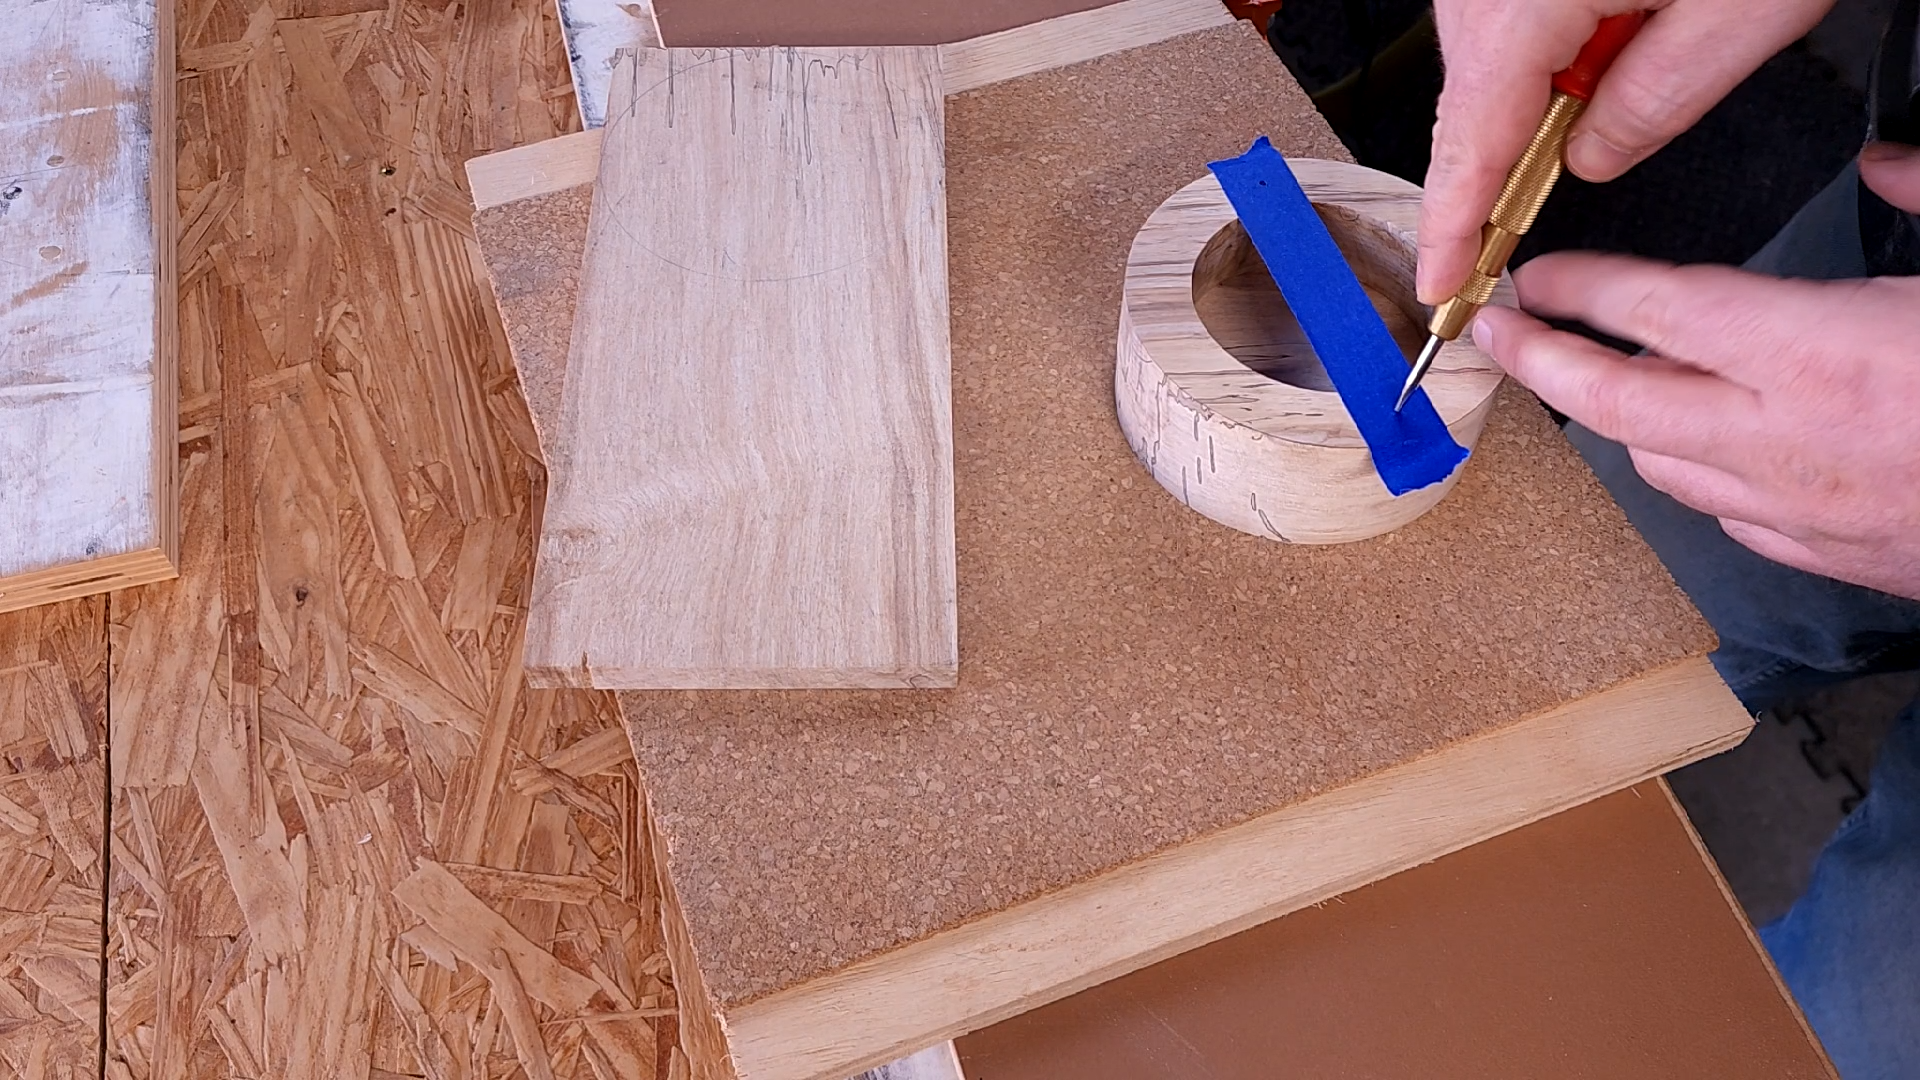
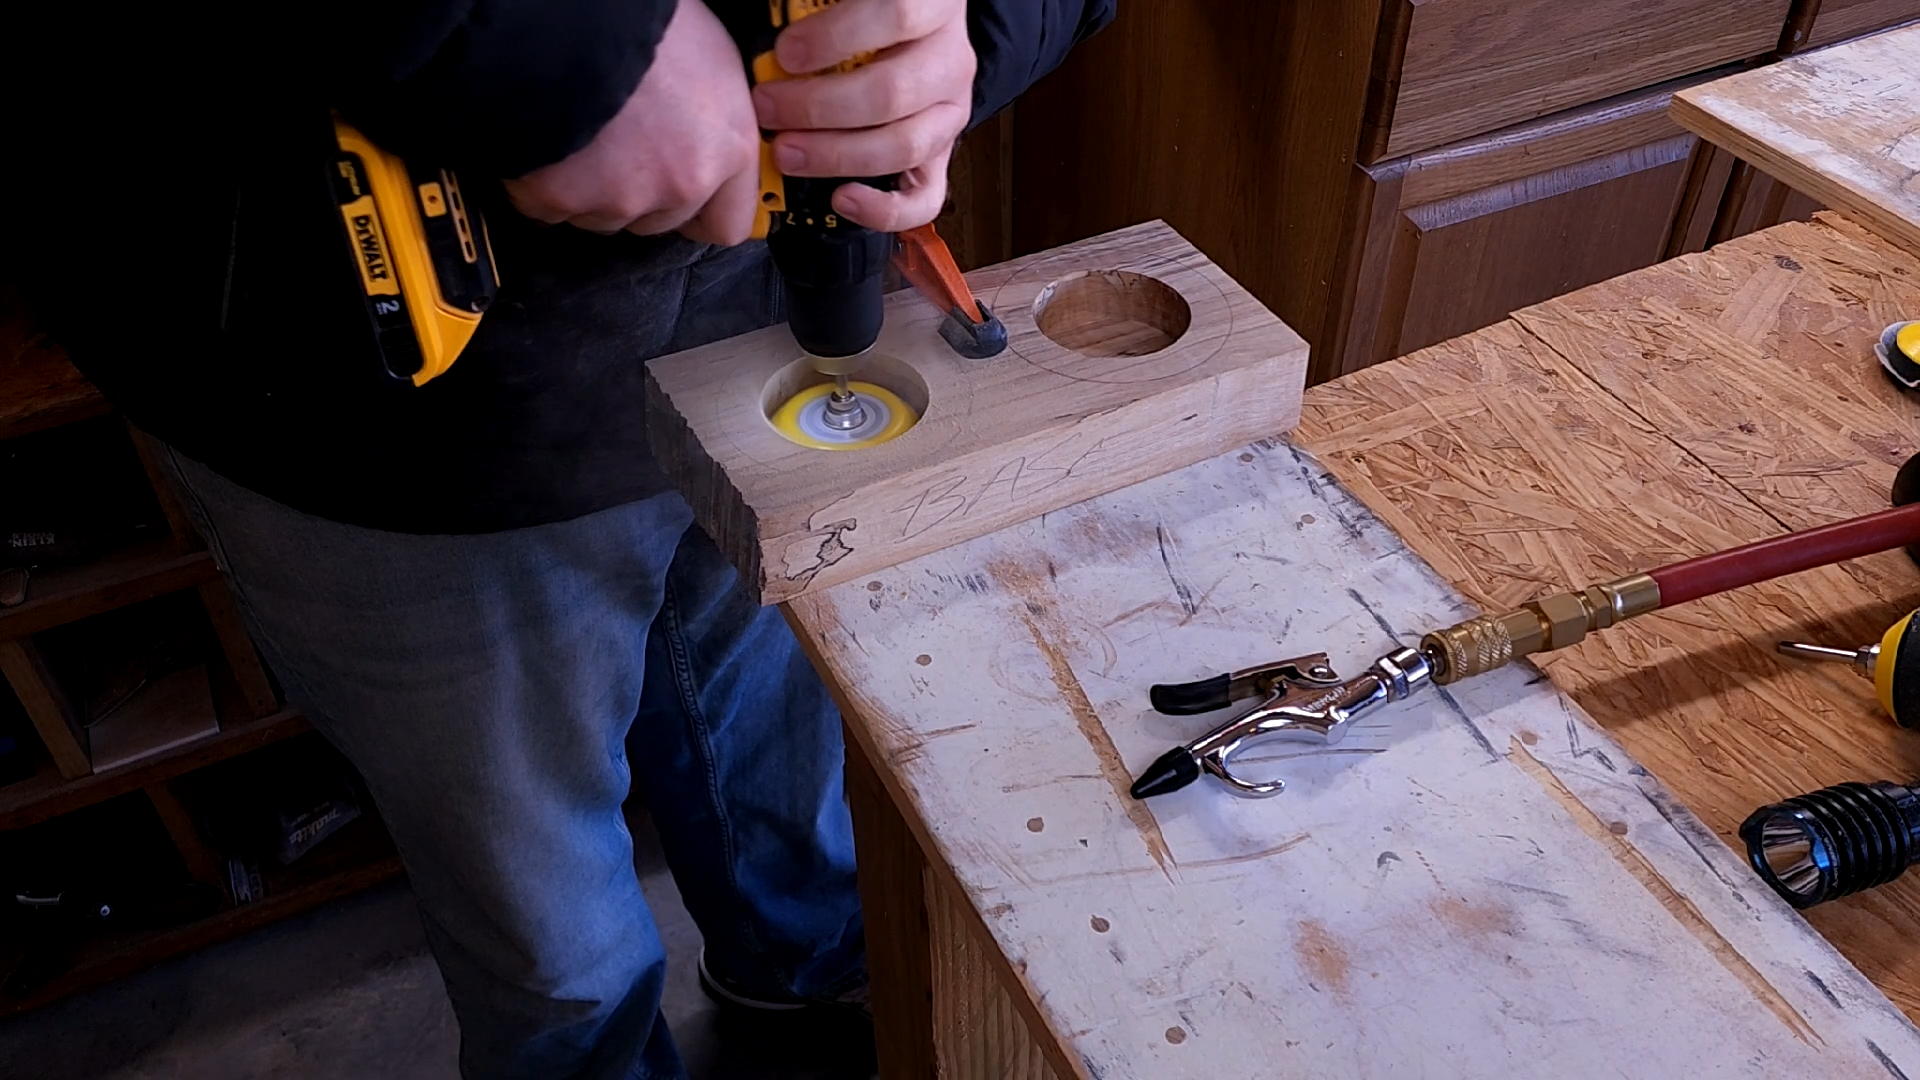
If you tend to be a bit anal, like myself, a pair of calipers quickly find your halfway mark, and leave a little hole for your hole punch to register from.
I transfer that blue tape to the lid blank and do my best to be centered on the lid just like the base.
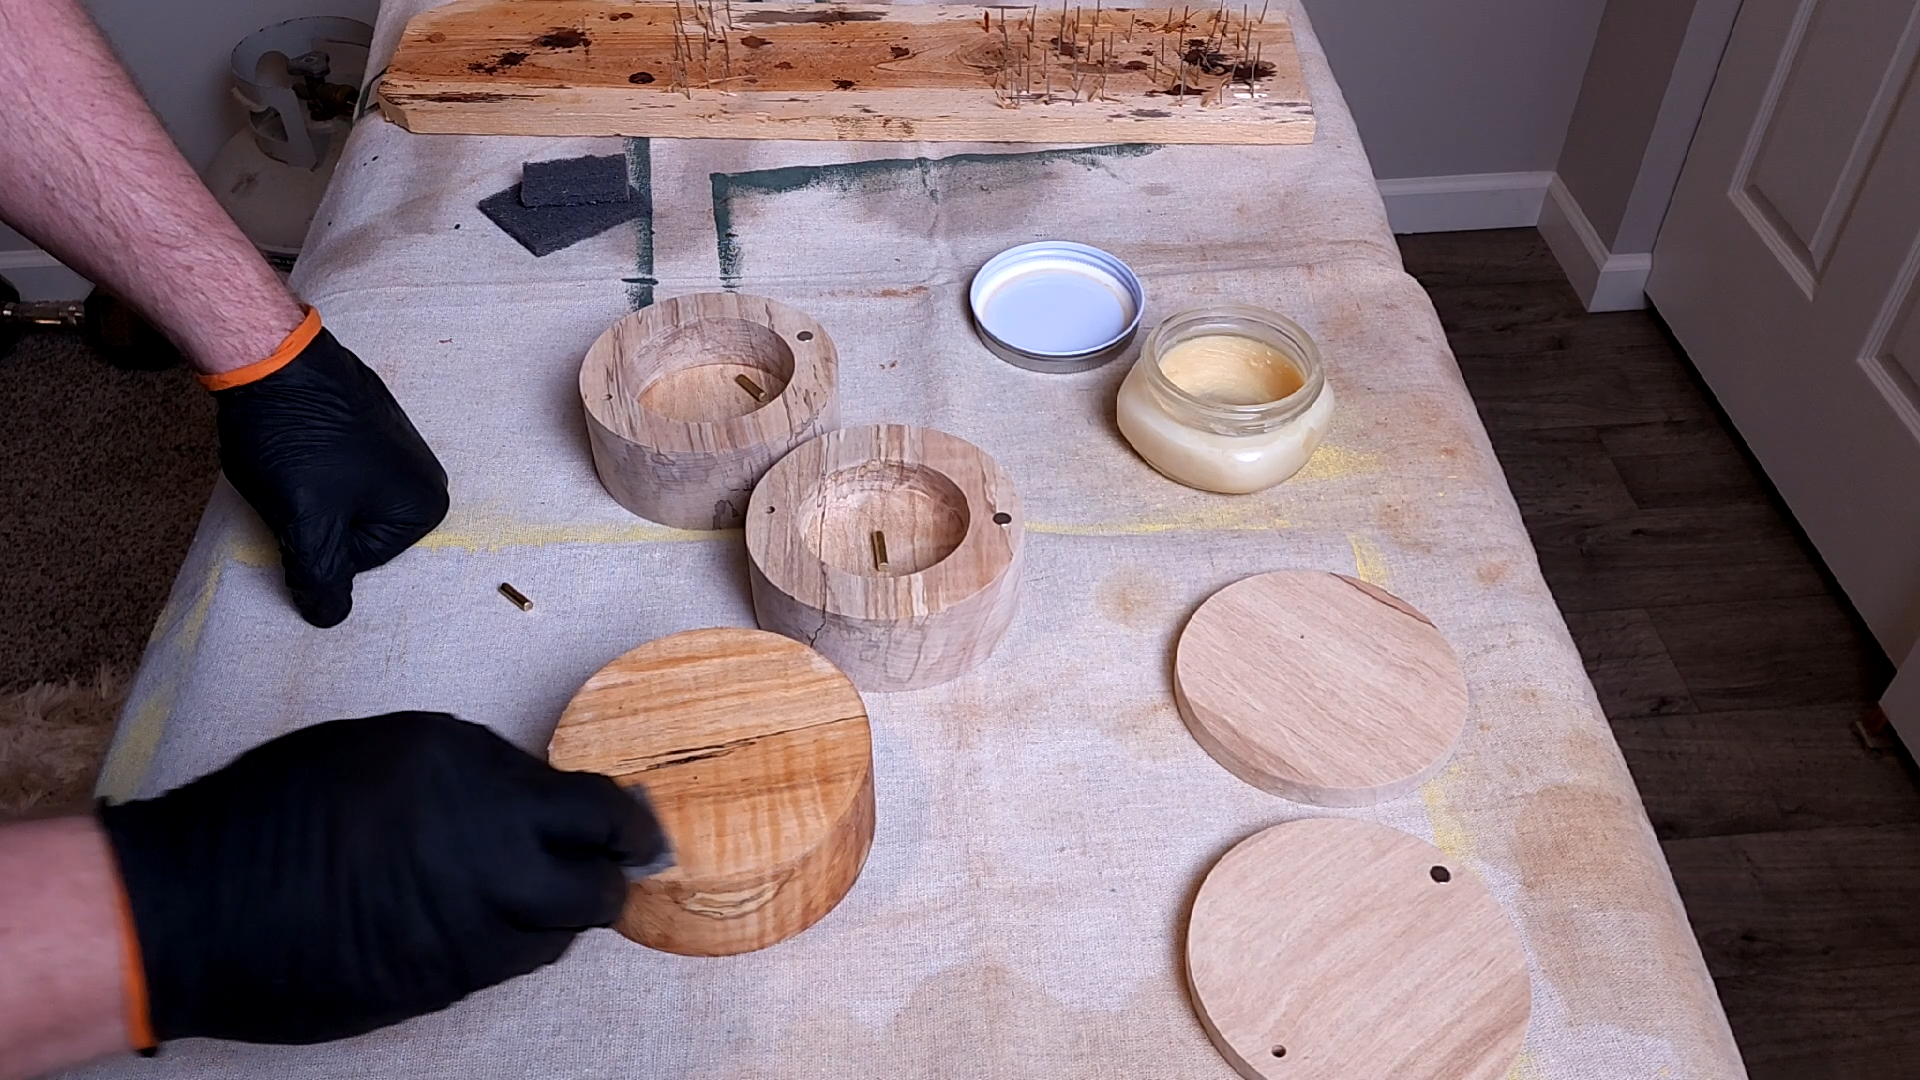
I then drill out the holes for the 3/16ths brass rod and the recesses for the Neodymium magnets.
I don’t have forstner bits that match the size of the rod and magnets so I use standard drill bits. I do my best to get the the magnet that goes into the base, just under the surface. I’m talking 1/128th of an inch. The magnet that goes on the lid, I let stick proud of the surface around the same amount. The result is a lovely tactile and auditory feedback when you close and open the lid.
I do this because my drill press is….(how do I put this nicely)…..inexpensive. The depth stop is such a pain to use that I would rather eyeball this part than mess with it. This part really isn’t too serious, just get close to or right at flush with both magnets and your lid will work fine.
The brass rod goes into the lid about half the thickness of the lid, whatever that ends up being. It goes into the bass as far as I feel like drilling, honestly, as long as I don’t blow out the bottom. I don’t go down that far, but you could, if you wanted to.
Take the ends of the brass rod to some 80 grit and thank me later.
WARNING! Before seating the magnets, be confident in your depth. Once you seat them, there is a strong chance you won’t be able to unseat them without damaging the wood. It’s a tight fit. Well, the way I drill my holes. Little dollop of super glue gel in the magnet recess, and use a toothpick to spread it around. Take the bottom of the magnet that goes into the recess, and scratch it with some sand paper. Gives the super glue something to grab to.
Don’t be afraid to chuck the rod or magnet drill bits into a hand drill for some very CAREFUL depth refinement.
The finishing process is very simple and easy to maintain. I cover the outside in a homemade wax, and then buff it out after 20 minutes or so. Nothing gets applied to the salt well, it got burnished and salt sits in there.
You can apply mineral oil to your cellar if you’d like. It.s not going to offer as much protection as wax though.

That is a good lookin salt cellar if I do say so myself!